firmware
configuration Guide
A step-by-step configuration guide is now available. It covers the installation of FluidNC on the Rodent board.
NOTE: This is a beta product, the comprehensive step-by-step guide is still being developed and refined. We welcome any feedback you may have. Once the official kit is released, the complete documentation will be made available.
Start by connecting the Rodent via USB to your computer.
Go to the FluidNC web configuration tool - click here.
Click on the connect button (1). Your browser will ask permition to connect via USB Serial to the right COM port, allow it.
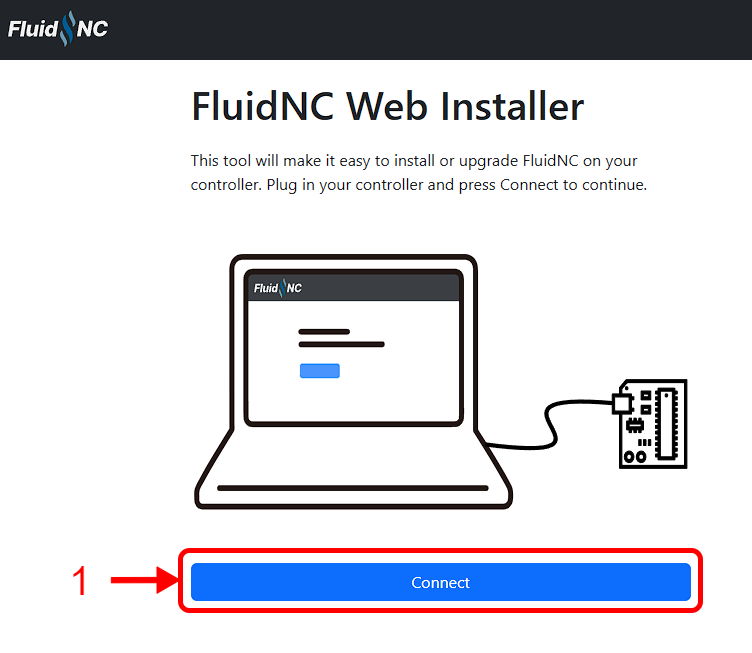
If the right COM port is selected, the browser will start establishing connection to the controller.

As soon as the connection is established, you will access the FluidNC installer tool. Proceed to click "Install FluidNC" (2), as shown below:
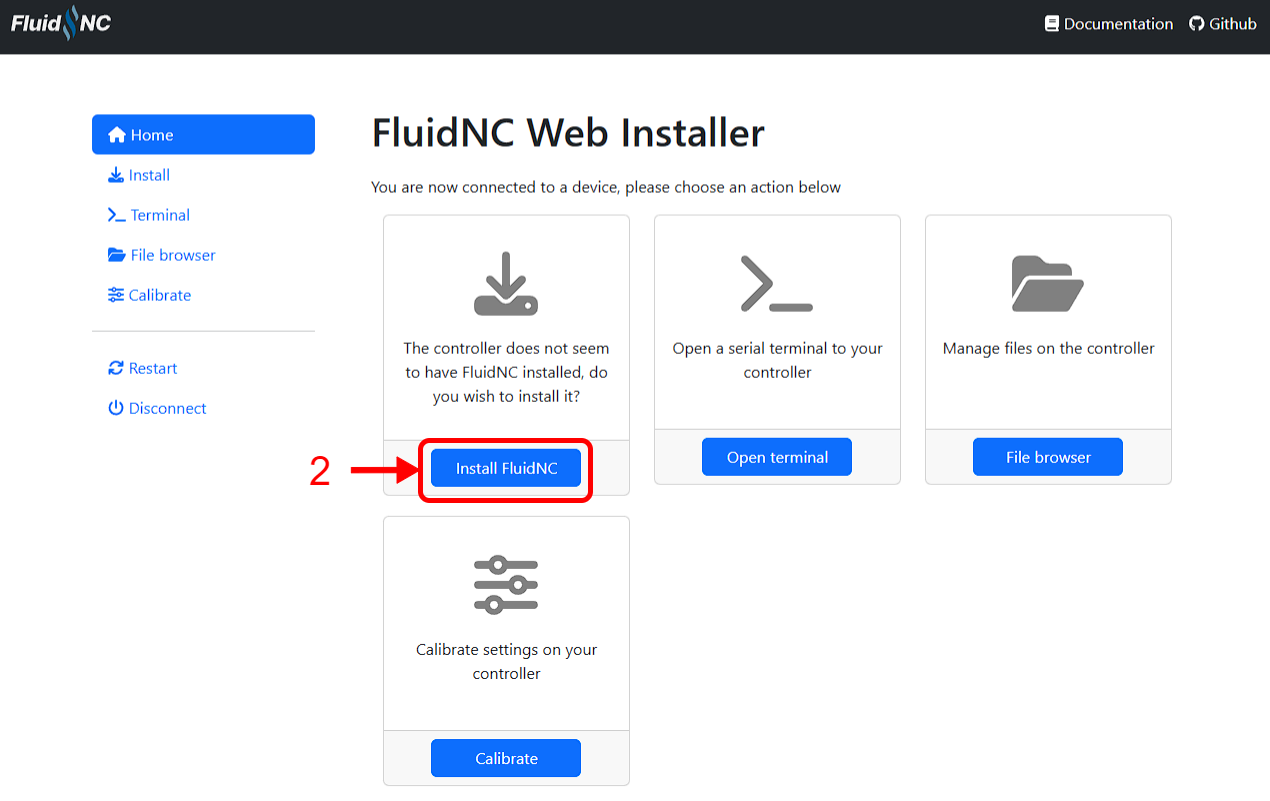
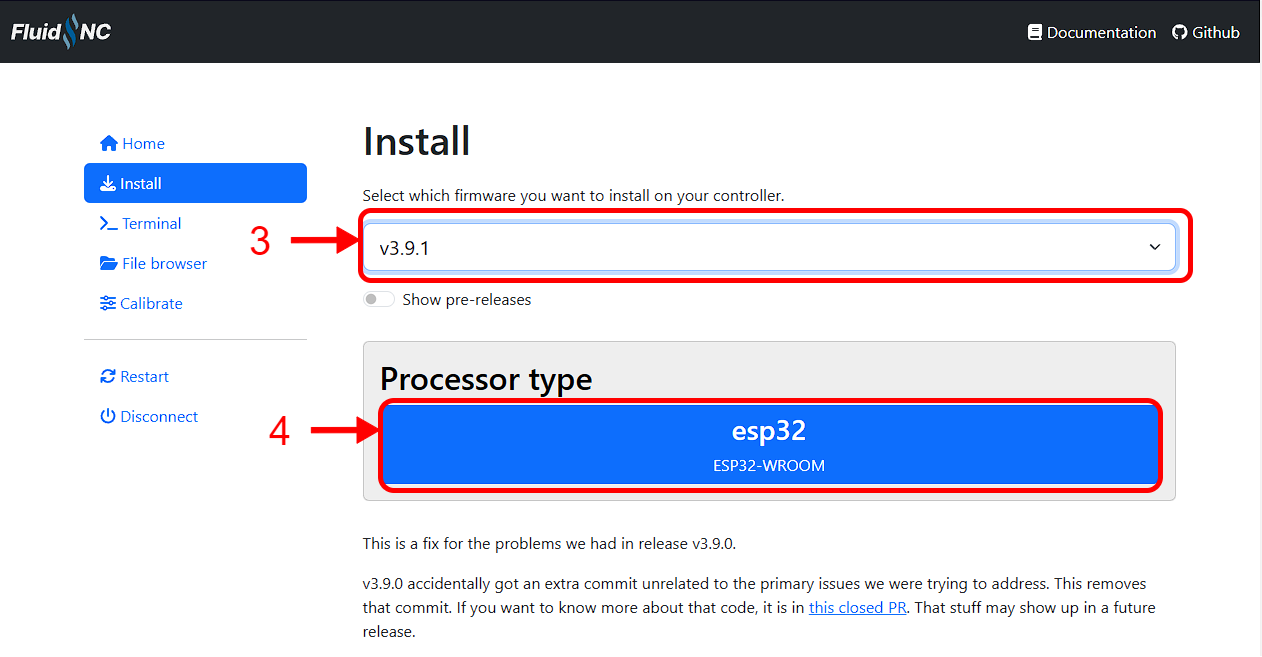
Ensure the latest official release is selected (3), then click the blue button to install FluidNC on your controller (4).
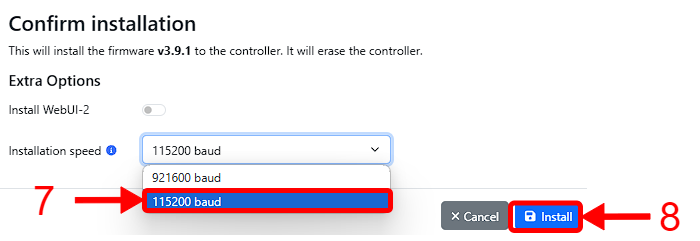
Click "wifi" (5) followed by "fresh-install" (6), then select the 115200 baud option (7) and finally click "install" (8).

FluidNC will be installed on your controller, wait for the installer to finish to click "continue" (9).
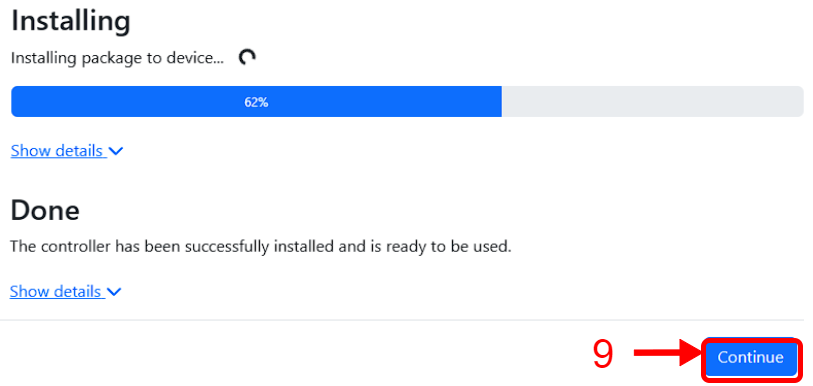
An Error will appear, stating that FluidNC wasn't able to find a config, we'll upload it on the next steps.

Click on the "Upgrade FluidNC" button (10).

Click on the "upload" button (11) and upload the correct file:
Basic Electronics bundle - Download here
Advanced Electronics bundle - Download here
Then check if the new config file is "active" (12)

If you have any config errro, reboot the board, the error should go away.
Navigate to the "wifi" (13) page and fill all the details with your network if you desire. Also fill the Access point settings, as the Rodent will use it's own wifi if it fails to connect.
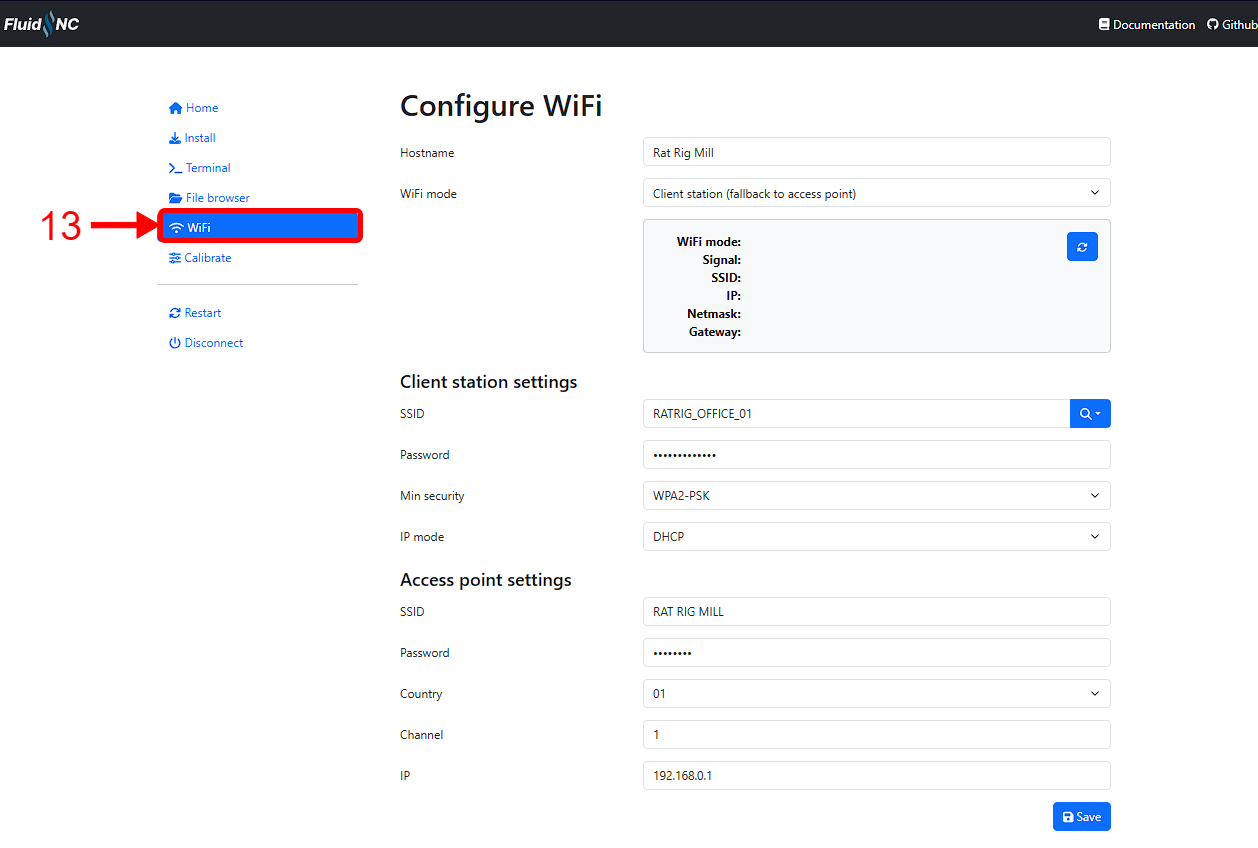
Reboot the board and acess it via your browser RatRigMill.local
