V-Core 4.0 - Corexy
Operation & Slicer
Obtaining a slicer
There are many slicers freely available for download, but Rat Rig recommends using one of the following three, as they are widely adopted and have large, active communities:
PrusaSlicer (recommended): free and open-source, available here.
SuperSlicer: free and open-source, available directly from its GitHub repository
OrcaSlicer: free and open-source, available directly from its GitHub repository
A slicer converts 3D models (STL, OBJ, 3MF) into G-code instructions for your 3D printer.
For the V-Core 4.0, Rat Rig now provides official and regularly updated profiles for PrusaSlicer, ensuring a more consistent and reliable starting point. These profiles are designed to get you printing quickly and with high quality. While they are not fully tuned to extract the absolute maximum performance from your printer, they provide a solid foundation to build upon.
You can also check our latest YouTube walkthrough video, where we explain the newest Rat Rig updates for PrusaSlicer with the V-Core 4.0.
01. Slicer Configuration
- In PrusaSlicer, RatRig can be found under “Other Vendors.”
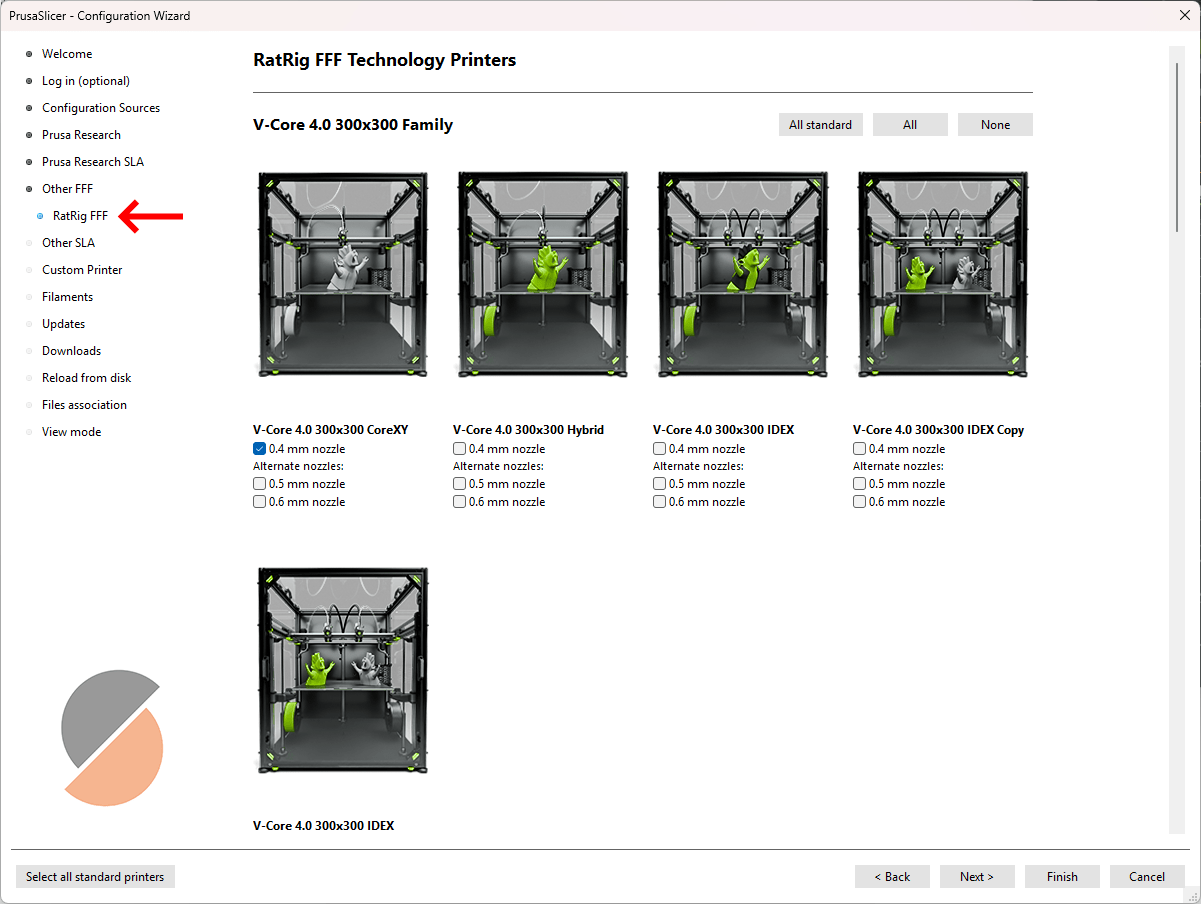
- Choose your machine within the correct machine family.
- You can also add filament profiles.
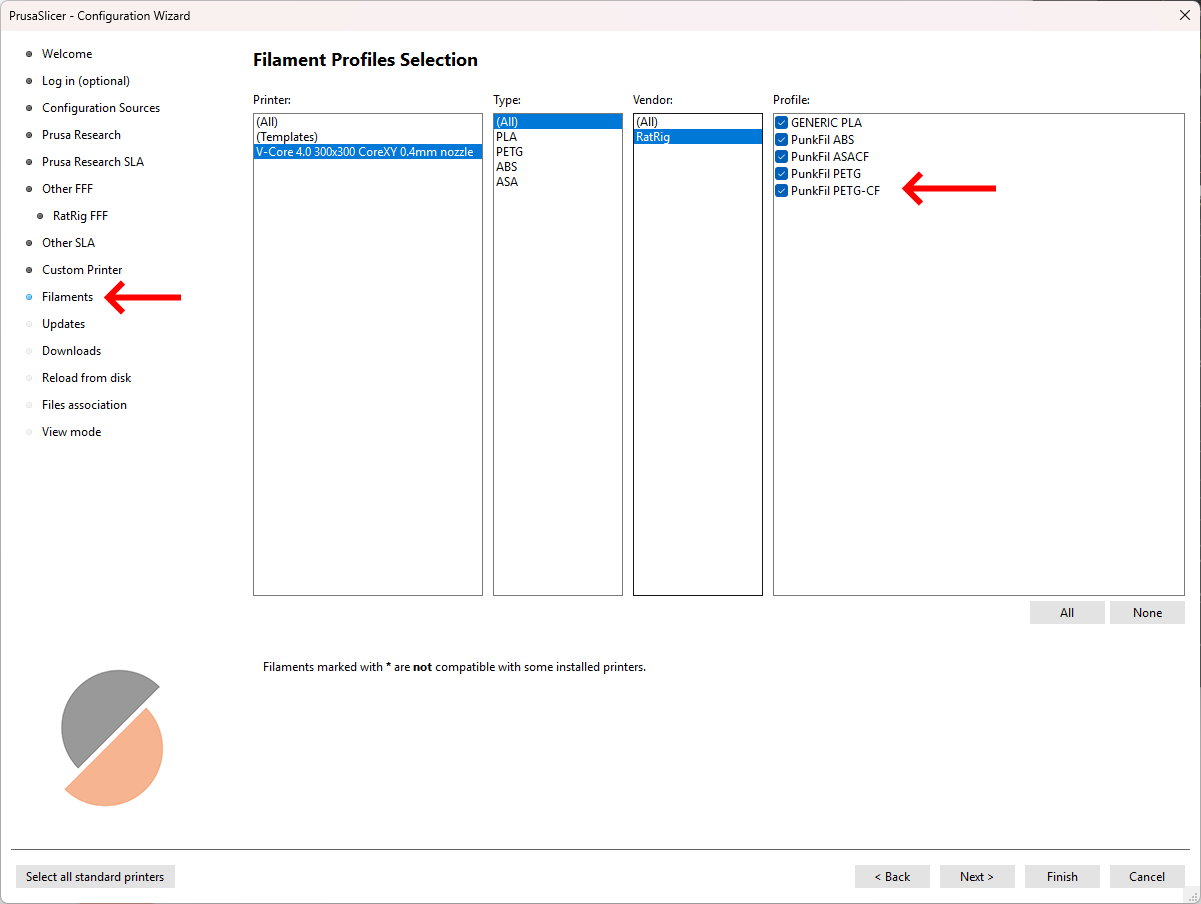 Note!Rat Rig includes pre-tuned PunkFil profiles! Even if you are using other filament brands, we recommend using these profiles for the same material types. Many parameters, such as cooling, extrusion multiplier, and pressure advance, are already optimized. While they may not perform identically with different brands, they provide a solid starting point for fine-tuning.
Add your machine - "Add physical printer" (Optional)
You can connect your machine directly to the slicer, allowing for a smoother workflow by sending the print job directly from the slicer software.

- Select your machine (1) and click on the gear next to it.
- Click "add physical printer" (2).
- Define a machine name (3).
- Select "Klipper (via moonraker)" and insert your machine url (4), created during the RatOS configuration.
- Click "Test" (5) to ensure your machine is connected to the Slicer, you should see a "Sucess!" window, otherwise check if your machine is connected to the same wifi network as your computer.
- Click "OK" (6).
02. Downloading a Test Model

03. how to slice
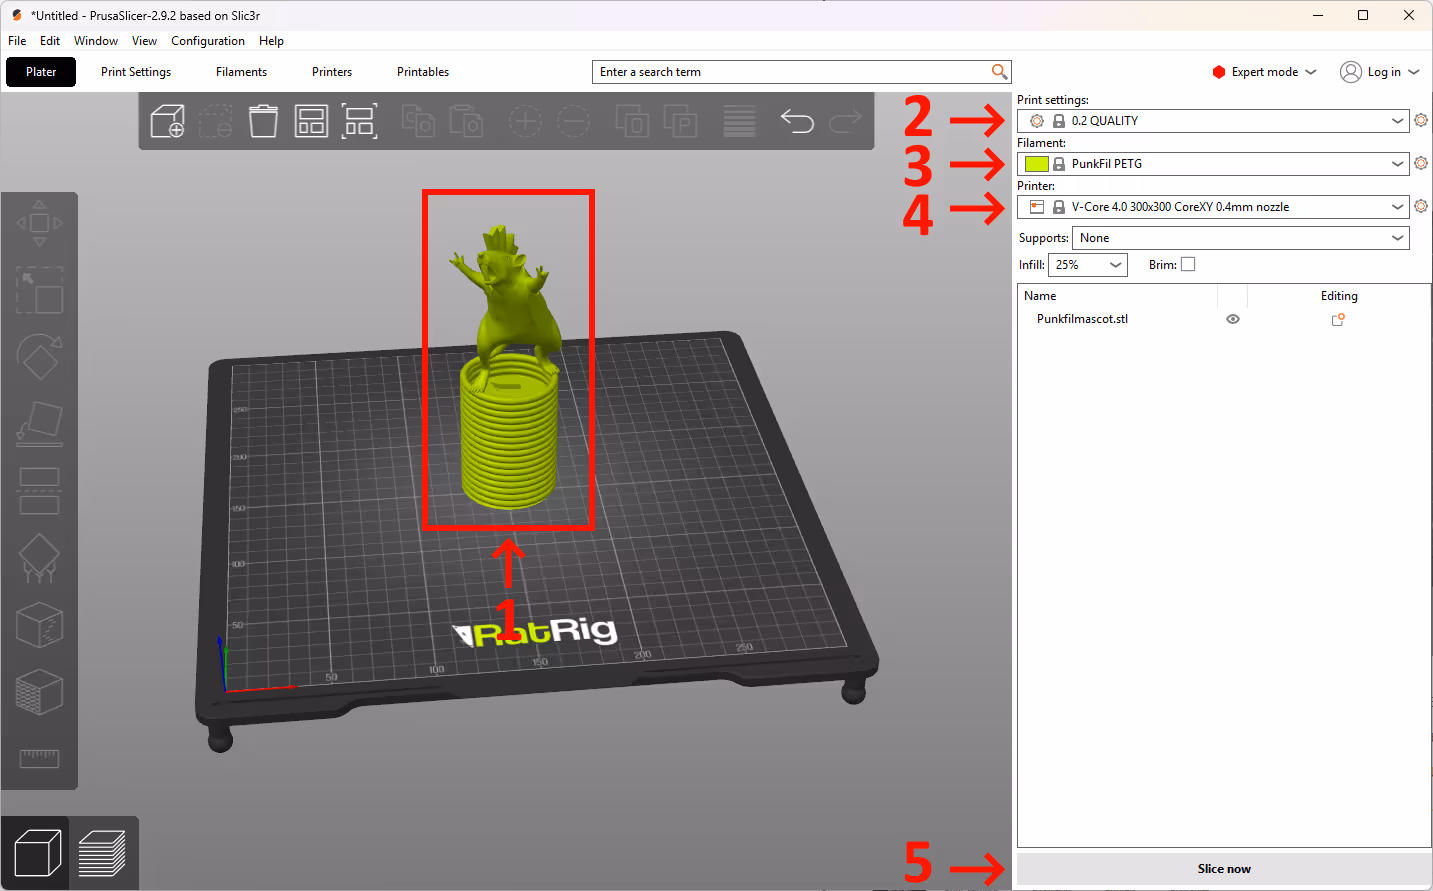
- Open PrusaSlicer and import the selected STL file by dragging it into the slicer (1).
- Next, select the print settings (2), which define parameters such as part strength, surface finish, resolution, and other relevant factors.
- Choose the filament type (3), which sets material-specific parameters such as printing temperature and cooling power.
- Select the machine size, variant, and nozzle size (4).
- Finally, click "Slice Now" (5) to generate the print file.
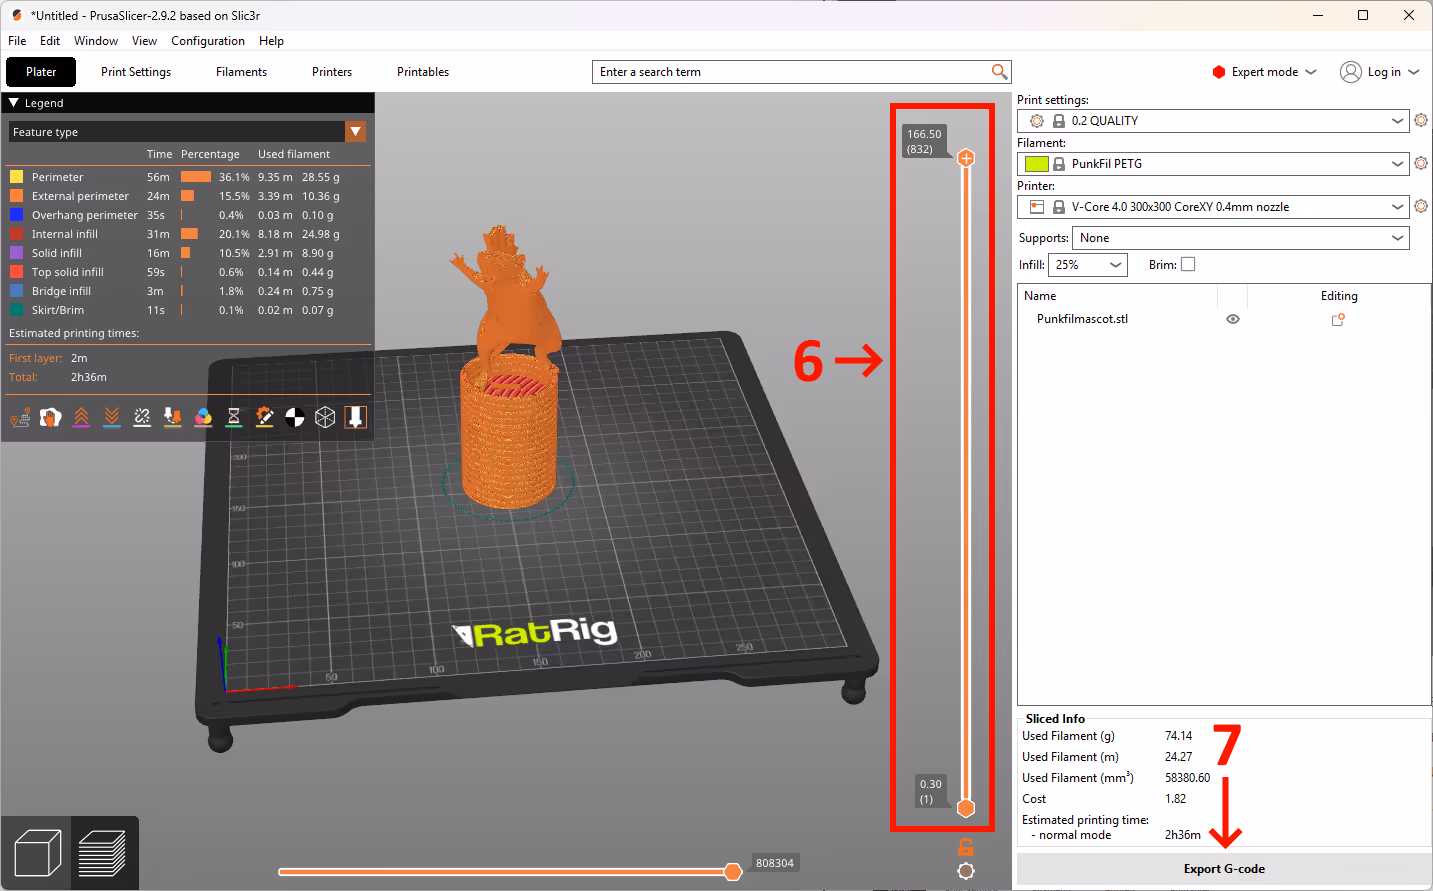
- After slicing, the slicer will generate a layer-by-layer preview of the printed part. You can use the vertical toggle (6) to inspect each layer individually.
- Once satisfied, click Export G-code (7) to generate the print file, then upload it to Mainsail to begin printing.