V-Core 4.0 - IDEX
Operation & Slicer
Obtaining a slicer
There are many slicers freely available for download, but Rat Rig recommends using one of the following three, as they are widely adopted and have large, active communities:
PrusaSlicer (recommended): free and open-source, available here.
SuperSlicer: free and open-source, available directly from its GitHub repository
OrcaSlicer: free and open-source, available directly from its GitHub repository
A slicer converts 3D models (STL, OBJ, 3MF) into G-code instructions for your 3D printer.
For the V-Core 4.0, Rat Rig now provides official and regularly updated profiles for PrusaSlicer, ensuring a more consistent and reliable starting point. These profiles are designed to get you printing quickly and with high quality. While they are not fully tuned to extract the absolute maximum performance from your printer, they provide a solid foundation to build upon.
You can also check our latest YouTube walkthrough video, where we explain the newest Rat Rig updates for PrusaSlicer with the V-Core 4.0.
01. Slicer Configuration
- In PrusaSlicer, RatRig can be found under “Other Vendors.”
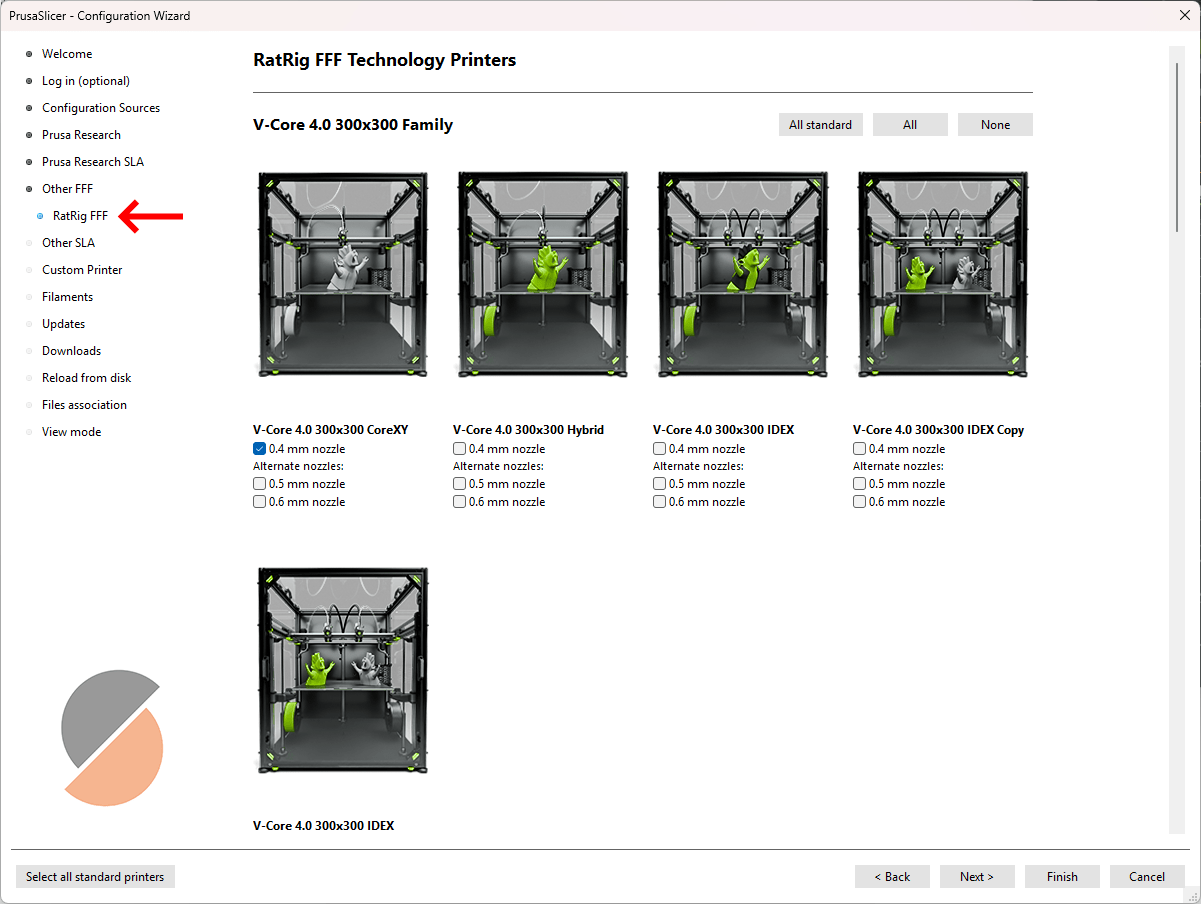
- Choose your machine within the correct machine family.
- You can also add filament profiles.
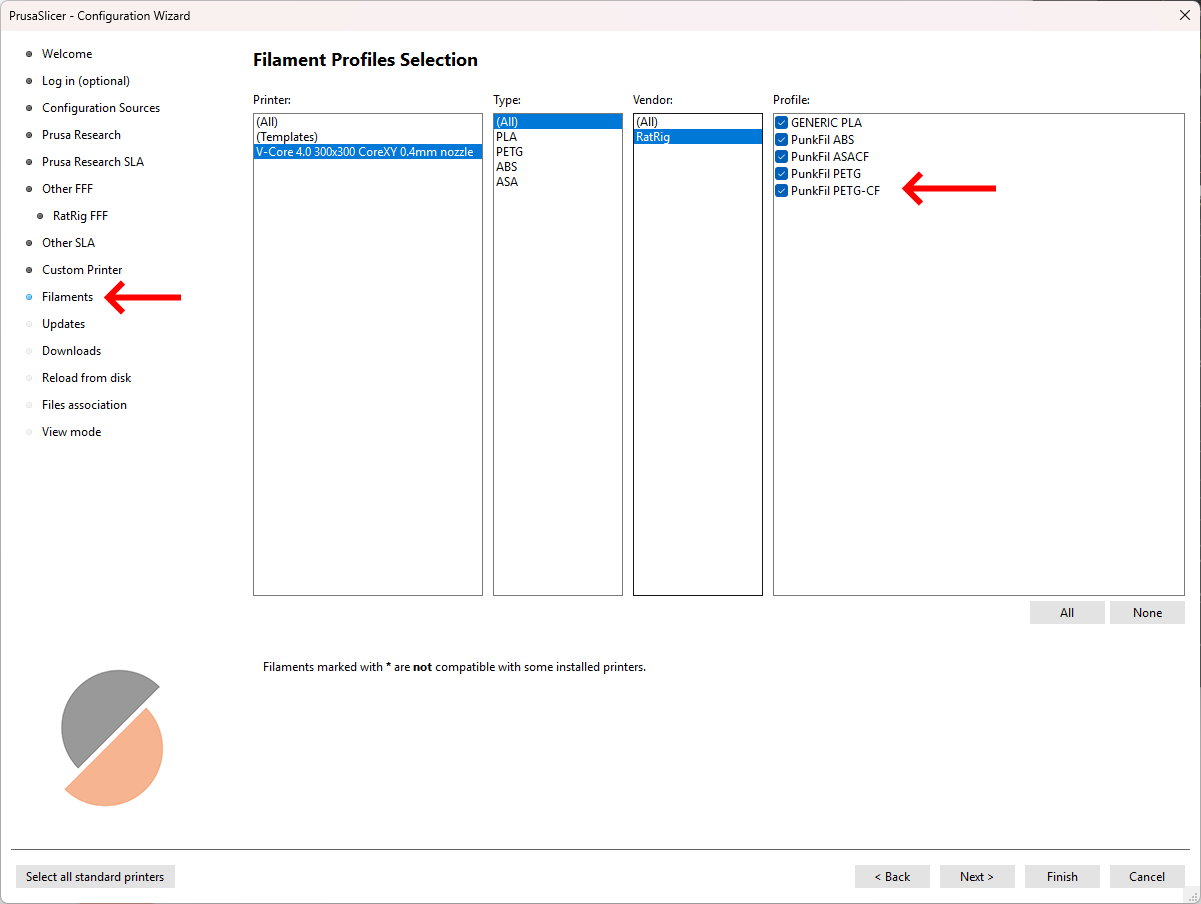 Note!Rat Rig includes pre-tuned PunkFil profiles! Even if you are using other filament brands, we recommend using these profiles for the same material types. Many parameters, such as cooling, extrusion multiplier, and pressure advance, are already optimized. While they may not perform identically with different brands, they provide a solid starting point for fine-tuning.
Add your machine - "Add physical printer" (Optional)
You can connect your machine directly to the slicer, allowing for a smoother workflow by sending the print job directly from the slicer software.

- Select your machine (1) and click on the gear next to it.
- Click "add physical printer" (2).
- Define a machine name (3).
- Select "Klipper (via moonraker)" and insert your machine url (4), created during the RatOS configuration.
- Click "Test" (5) to ensure your machine is connected to the Slicer, you should see a "Sucess!" window, otherwise check if your machine is connected to the same wifi network as your computer.
- Click "OK" (6).
02. How to slice
Rat Rig provides predefined slicer parameters for all V-Core 4 models, which will produce optimal results in most cases. However, due to the inherent variability of 3D printing, certain parts with complex geometries may require adjustments to slicer settings to achieve the best print quality.
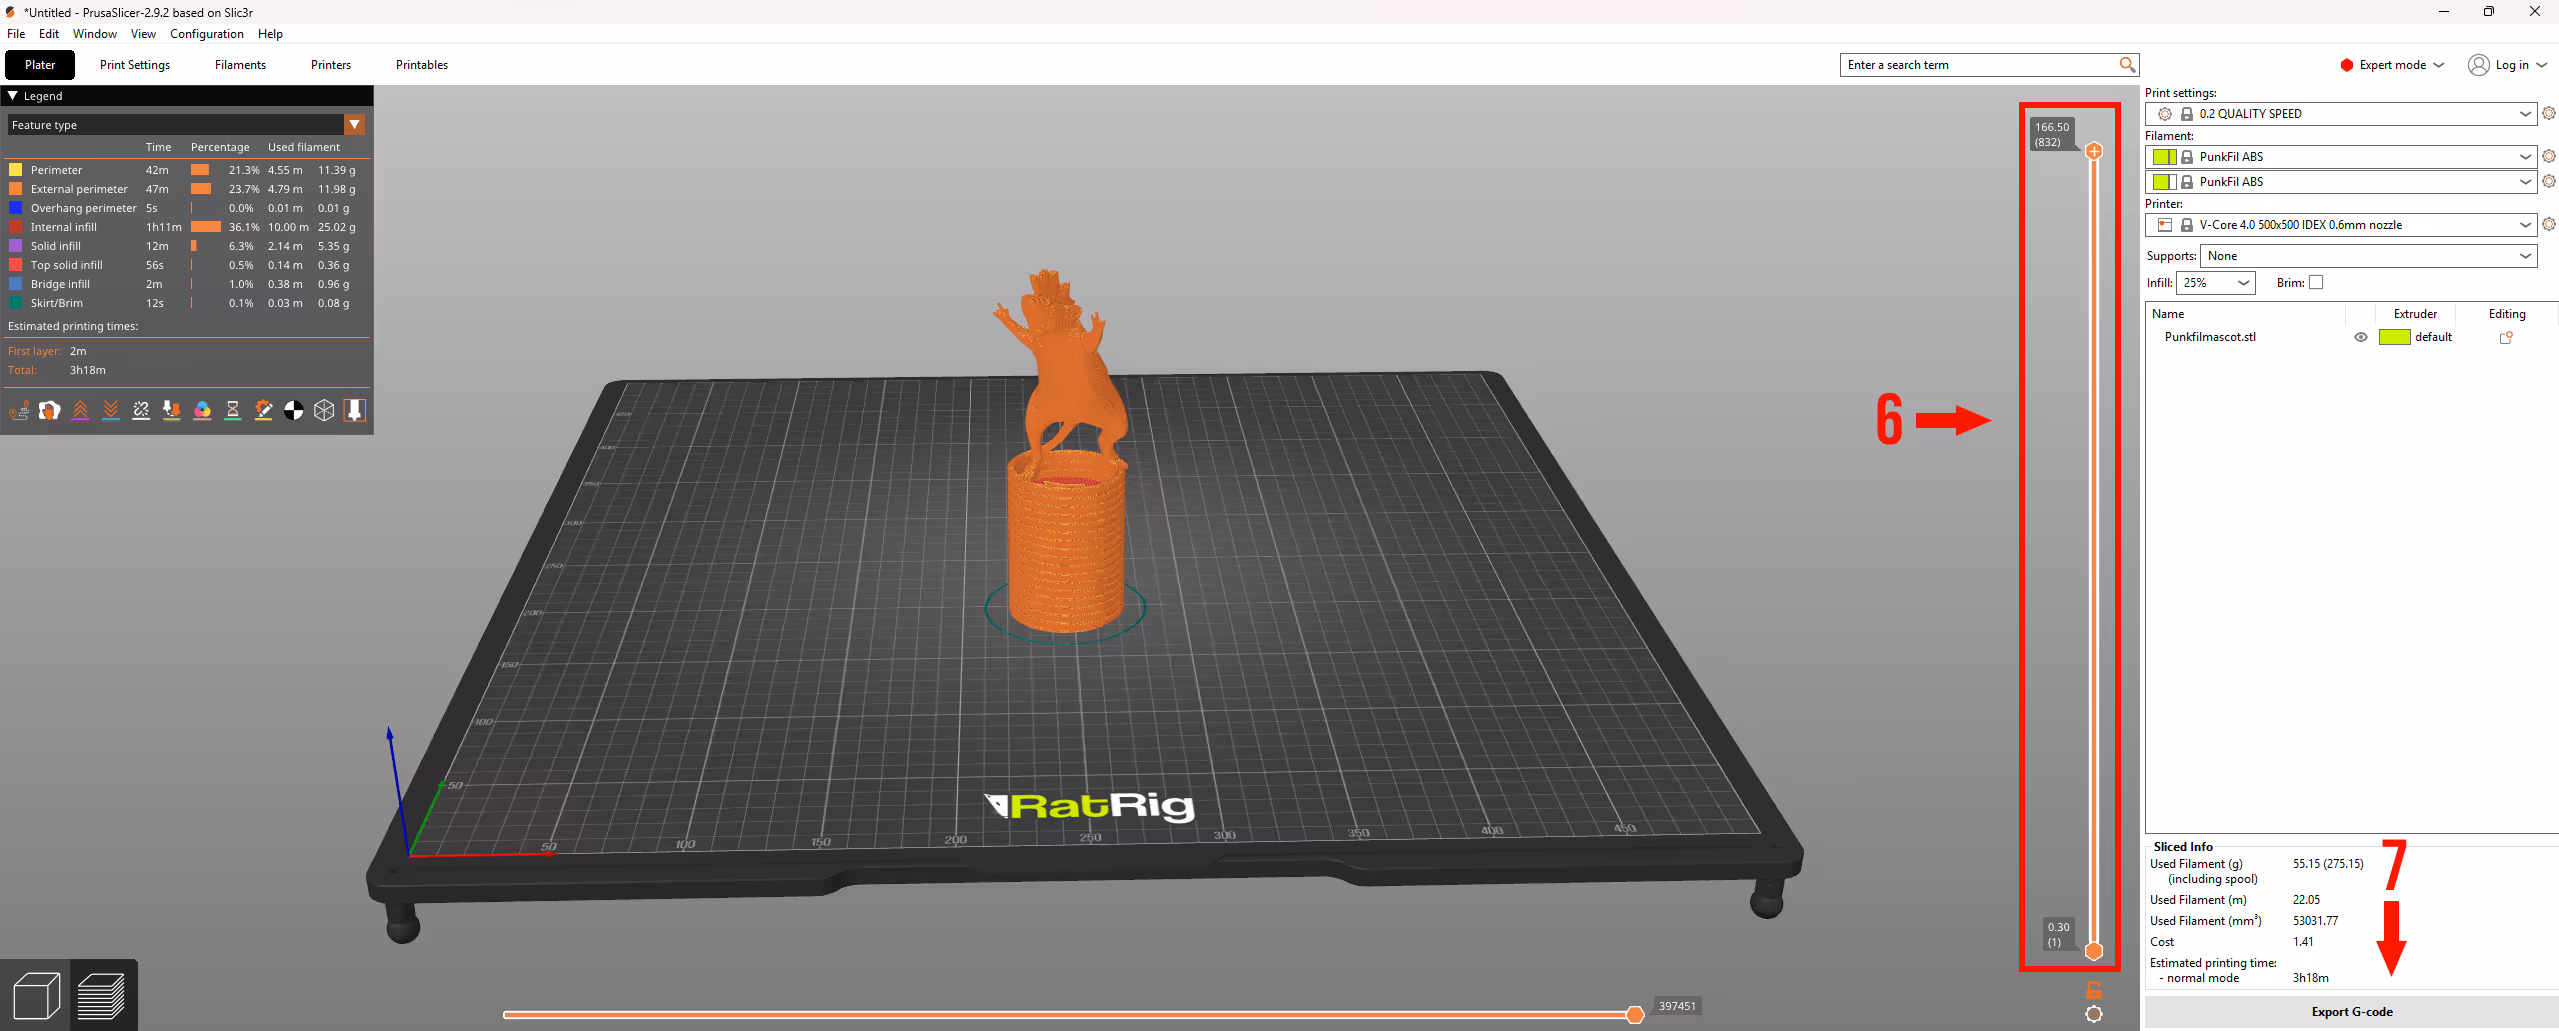
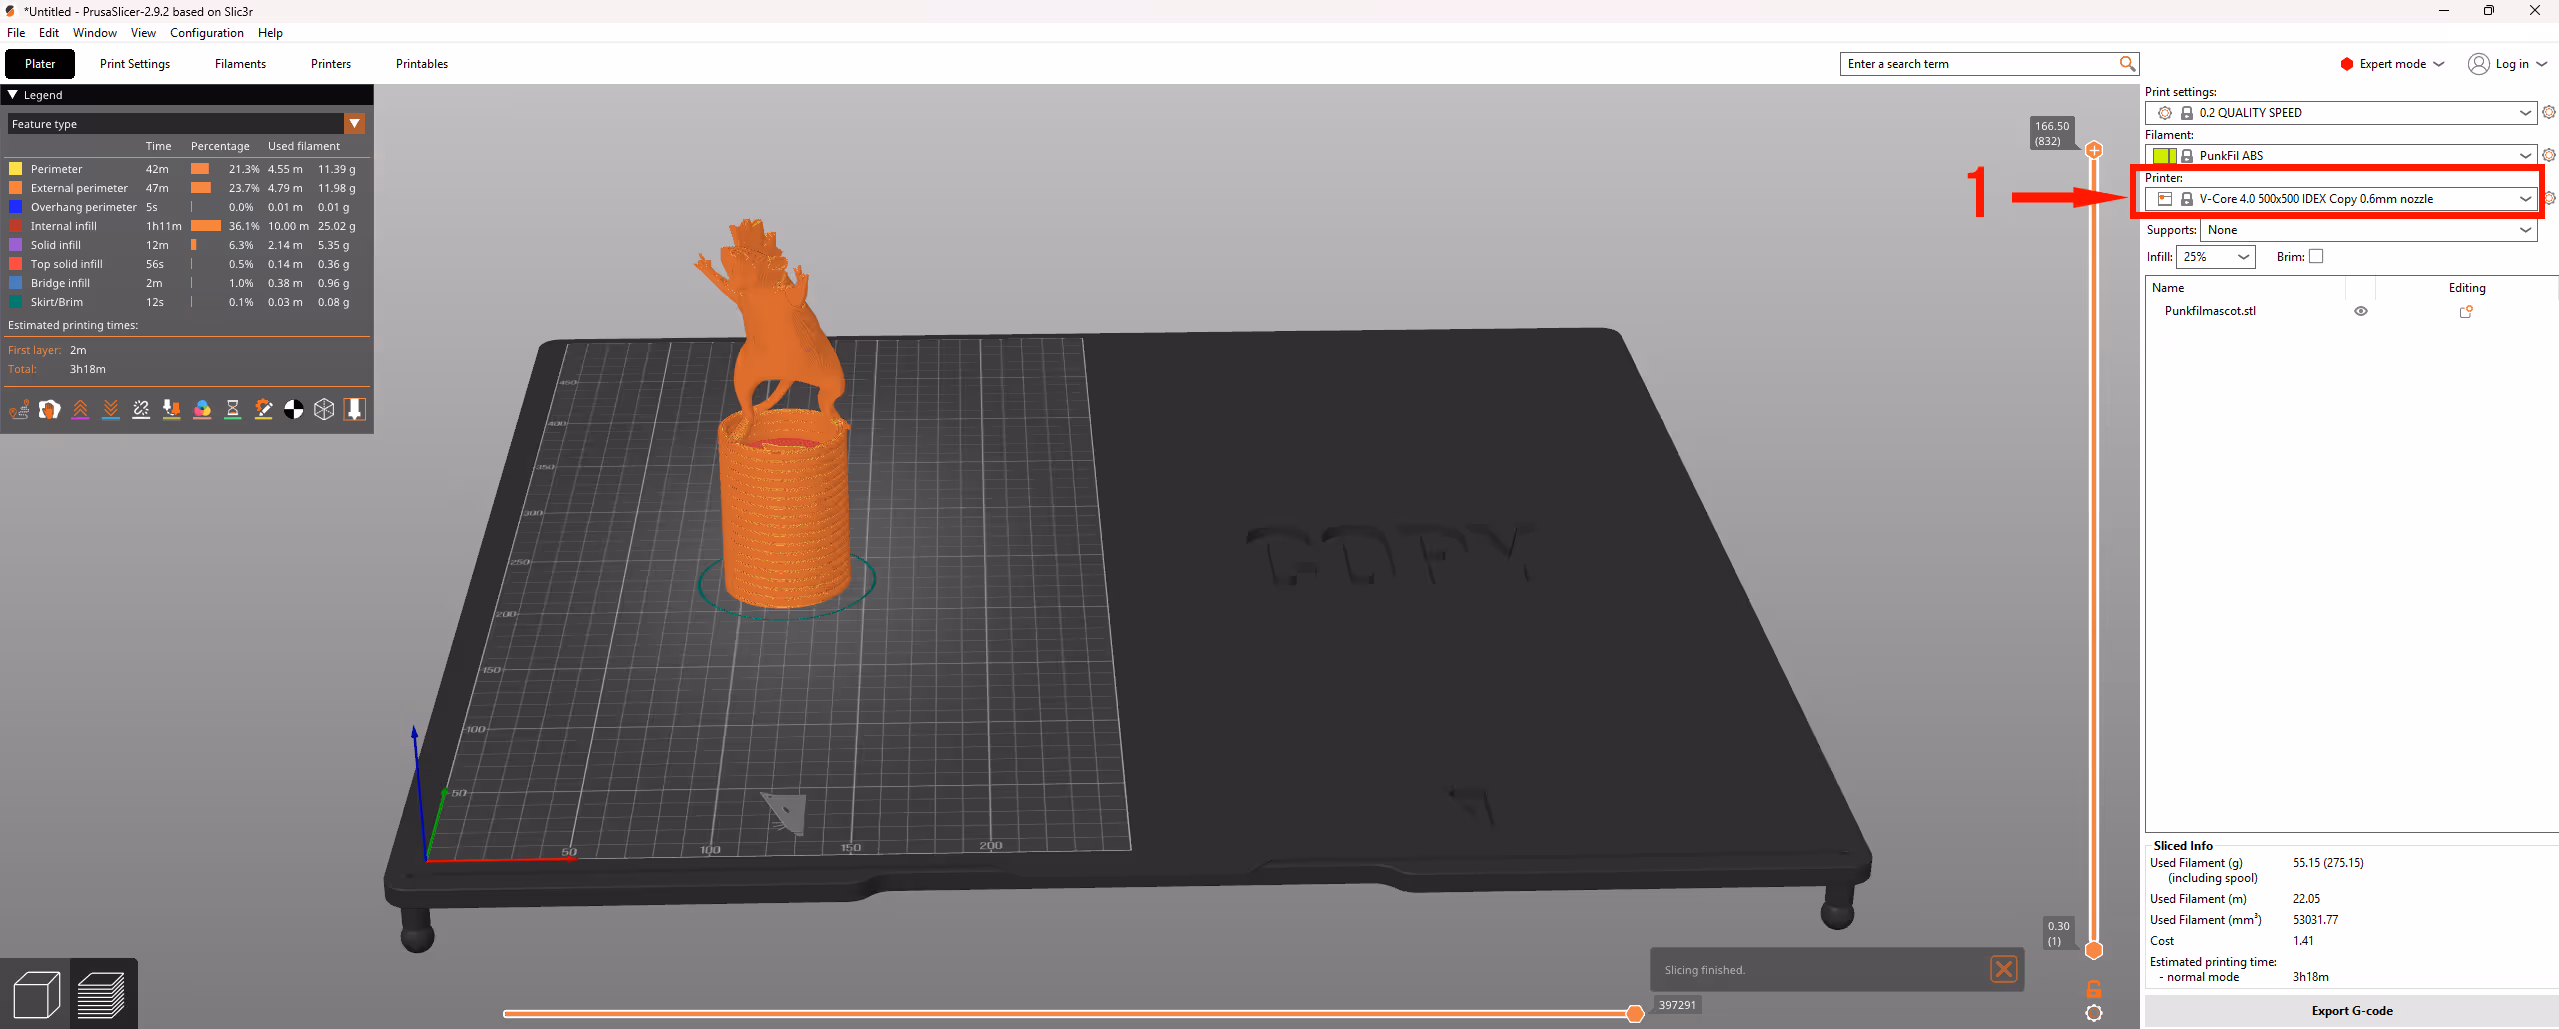
1. Open PrusaSlicer and import the selected STL file by dragging it into the slicer (1).
2. Next, select the print settings (2), which define parameters such as part strength, surface finish, resolution, and other relevant factors.
3. Choose the filament type (3), which sets material-specific parameters such as printing temperature and cooling power.
4. Select the machine size, variant, and nozzle size (4). Finally, click "Slice Now" (5) to generate the print file.

5. After slicing, the slicer will generate a layer-by-layer preview of the printed part. You can use the vertical toggle (6) to inspect each layer individually.
This feature helps identify potential geometry constraints that may need adjustments in the print settings. Simply drag the toggle up and down to review the layers. While this step is not required for printing, it is a useful habit as you become more familiar with slicer settings. Once satisfied, click "Export G-code" (7) to generate the print file. Then, upload it to Mainsail, and you're ready to start printing!
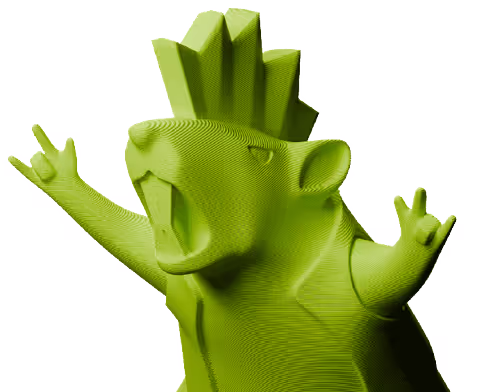
After finishing this guide you can print our Punkfil Mascot to see how your machine is performing, this is all the tuning you need to get started with very good results. Further tuning might be required to achieve a specific goal, other settings not approached here are not essential and can worsen the print quality if not done correctly.

03. Slicing for Dual Material
3.1. VAOC Preparation
- Navigate to the VAOC tab, and hit start calibration.

- Calibrate the XY offsets for T0 by dragging the nozzle into the center of the crosshair
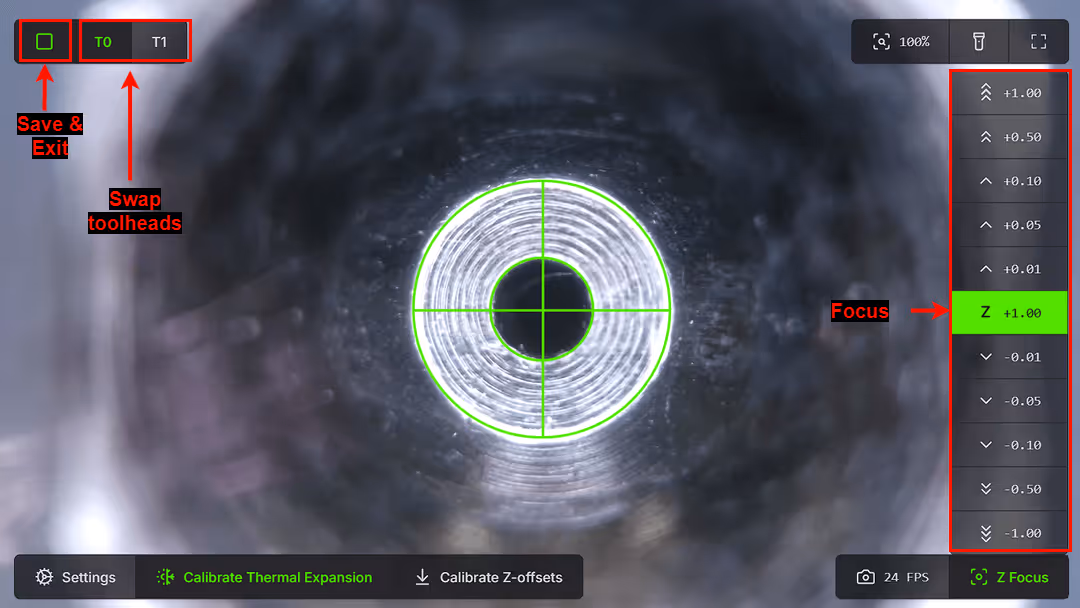
- Switch to T1 and Calibrate the XY offsets by dragging the nozzle into the center of the crosshair
- Switch between T0 and T1 two to three times to achieve perfect nozzle alignment. Align between each verification if necessary.
- Click the square icon at the top left corner to end the VAOC.
- The machine is ready to print dual color parts accurately!
3.2. Slicing
- To print a dual material part, open the respective parts of the model in the slicer.Note!The slicer needs to know which toolhead should be used for which section of the model. For this reason, it's common to use multi-part model files for IDEX. Import multi-part models into the slicer as shown below.
Click here to download a dual color benchy and try for yourself. In this example we will use a charmander model off printables, it comes in two STL files, open one of them. Click here to download and try yourself.
- Right click on top of the model and select "Add part" -> "Load..." then select the other STL. The two models should align perfectly.

- On the right menu, you can select the two materials you want to print with. Then, on the lower right, you can select which body is printed with which material.

- Click "Slice Now" to process the model, then export the G-code file. Once exported, upload it to the machine and start printing!
04. copy & mirror modes
- In the machine menu, select your IDEX in the desired mode — in this case, Copy Mode.
 Note!When you select either Copy Mode or Mirror Mode, you’ll notice that your build plate changes. This allows you to see the exact area available for printing in Copy or Mirror mode.From this point on, the slicing process will be the same as for a normal single-toolhead print.
 - Now you’re ready to export your G-code.
05. IDEX Macros

- IDEX SINGLE - Single toolhead or Dual material:
To print with only one toolhead or dual material, just hit the Single IDEX button in the IDEX Macros section, this mode is selected by default when you turn on the machine. We advice to always run a VAOC calibration before each print. - IDEX COPY:
To print in copy mode, just hit the COPY button in the IDEX Macro section, the toolheads will do a copy mode move to show you the machine is ready. - IDEX MIRROR:
To print in mirror mode, just hit the MIRROR button in the IDEX Macro section, the toolheads will do a mirror mode move to show you the machine is ready. - TOOLSHIFT© CONFIGURATION:
The toolshift configuration has all the settings you may need to tune for multi-material printing. It’s mostly meant for advanced users who are interested in fine tunning toolshifts, this can be useful for all sorts of different materials, as many parameters like speed, acceleration, Z-hop, restactions, purge length, purge time can be tuned to suit your specific needs. - REMAP TOOLHEADS:
Toolhead remap allows you to change the designation of the toolhead, meaning you can tell klipper T1 is T0 or T0 is T1, this can be useful if you incorrectly set the colors/material in the slicer for a dual material print, instead of re slicing the object you can just remap the toolheads. Or imagine you need to print the same g-code with the inverted colors, just remap the toolheads, no need to tinker in the slicer.